Chapter 9 - Egg as egg
Updated to Gio 0.8.0 as of April 4th 2025
Goals
The intent of this section is to draw an actual egg.

Outline
Here we utilize basic Gio functionality to draw totally custom graphics, which for us is an egg.
Code
All the new code is within the rigid that previously displayed the circle.
layout.Rigid(
  func(gtx C) D {
    // Draw a custom path, shaped like an egg
    var eggPath clip.Path
    op.Offset(image.Pt(gtx.Dp(200), gtx.Dp(125))).Add(gtx.Ops)
    eggPath.Begin(gtx.Ops)
    // Rotate from 0 to 360 degrees
    for deg := 0.0; deg <= 360; deg++ {

      // Egg math (really) at this brilliant site. Thanks!
      // https://observablehq.com/@toja/egg-curve
      // Convert degrees to radians
      rad := deg * math.Pi / 180
      // Trig gives the distance in X and Y direction
      cosT := math.Cos(rad)
      sinT := math.Sin(rad)
      // Constants to define the eggshape
      a := 110.0
      b := 150.0
      d := 20.0
      // The x/y coordinates
      x := a * cosT
      y := -(math.Sqrt(b*b-d*d*cosT*cosT) + d*sinT) * sinT
      // Finally the point on the outline
      p := f32.Pt(float32(x), float32(y))
      // Draw the line to this point
      eggPath.LineTo(p)
    }
    // Close the path
    eggPath.Close()

    // Get hold of the actual clip
    eggArea := clip.Outline{Path: eggPath.End()}.Op()

    // Fill the shape
    // color := color.NRGBA{R: 255, G: 239, B: 174, A: 255}
    color := color.NRGBA{R: 255, G: uint8(239 * (1 - progress)), B: uint8(174 * (1 - progress)), A: 255}
    paint.FillShape(gtx.Ops, color, eggArea)

    d := image.Point{Y: 375}
    return layout.Dimensions{Size: d}
  },
),
The main idea is to define a custom egg shaped clip.Path. We draw a line to define it, fill the inside and any drawing on the outside is ignored.
Comments
First the new path is defined, var eggPath clip.Path
Then an operation is created to move 200 points right, 125 points down, op.Offset( ). As before, this is from the top-left corner inside this widget. Note that we don’t send in hard pixels, but instead convert to Dp, device independent pixels, to ensure the user experience is comparable across different devices and resolutions.
We’re now at the center of our egg. This is where the path begins, eggPath.Begin( )
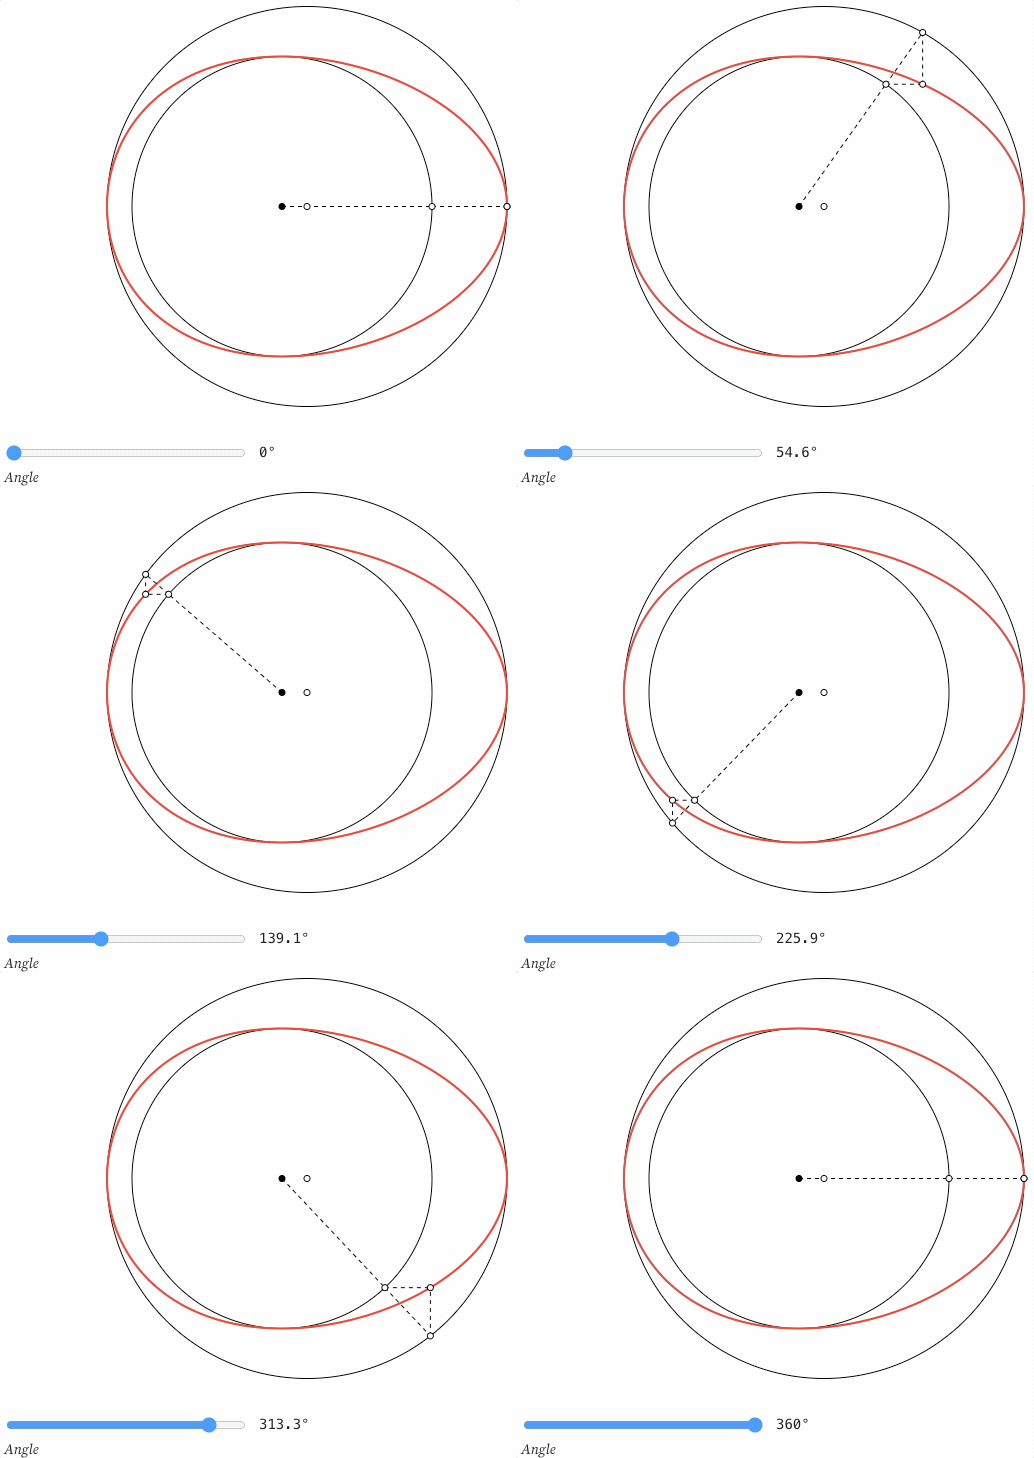
From here we rotate a full 360 degrees and continue drawing the outline of the Egg. We use the math for a Hügelschäffer Egg, as presented on Torben Jansen’s excellent interactive blog. The formula receives an angle, from 0 to 360, calculates an appropriate distance from center and returns the outline as a point. Math is fun!

Regarding Gio, the important line is the last in the for-loop, eggPath.LineTo(p). At this point, math has found the next point p on the 360-degree roundtrip around the egg, and we use eggPath.LineTo(p) to move the pen to this specific coordinate point.
After completing the for-loop the egg-shape is almost done. We finalize it explicitly by calling eggPath.Close() which closes the path.
With the path complete, we want to get the area inside that path. clip.Outline{ }.Op( ) gives us the clip operation representing this area.
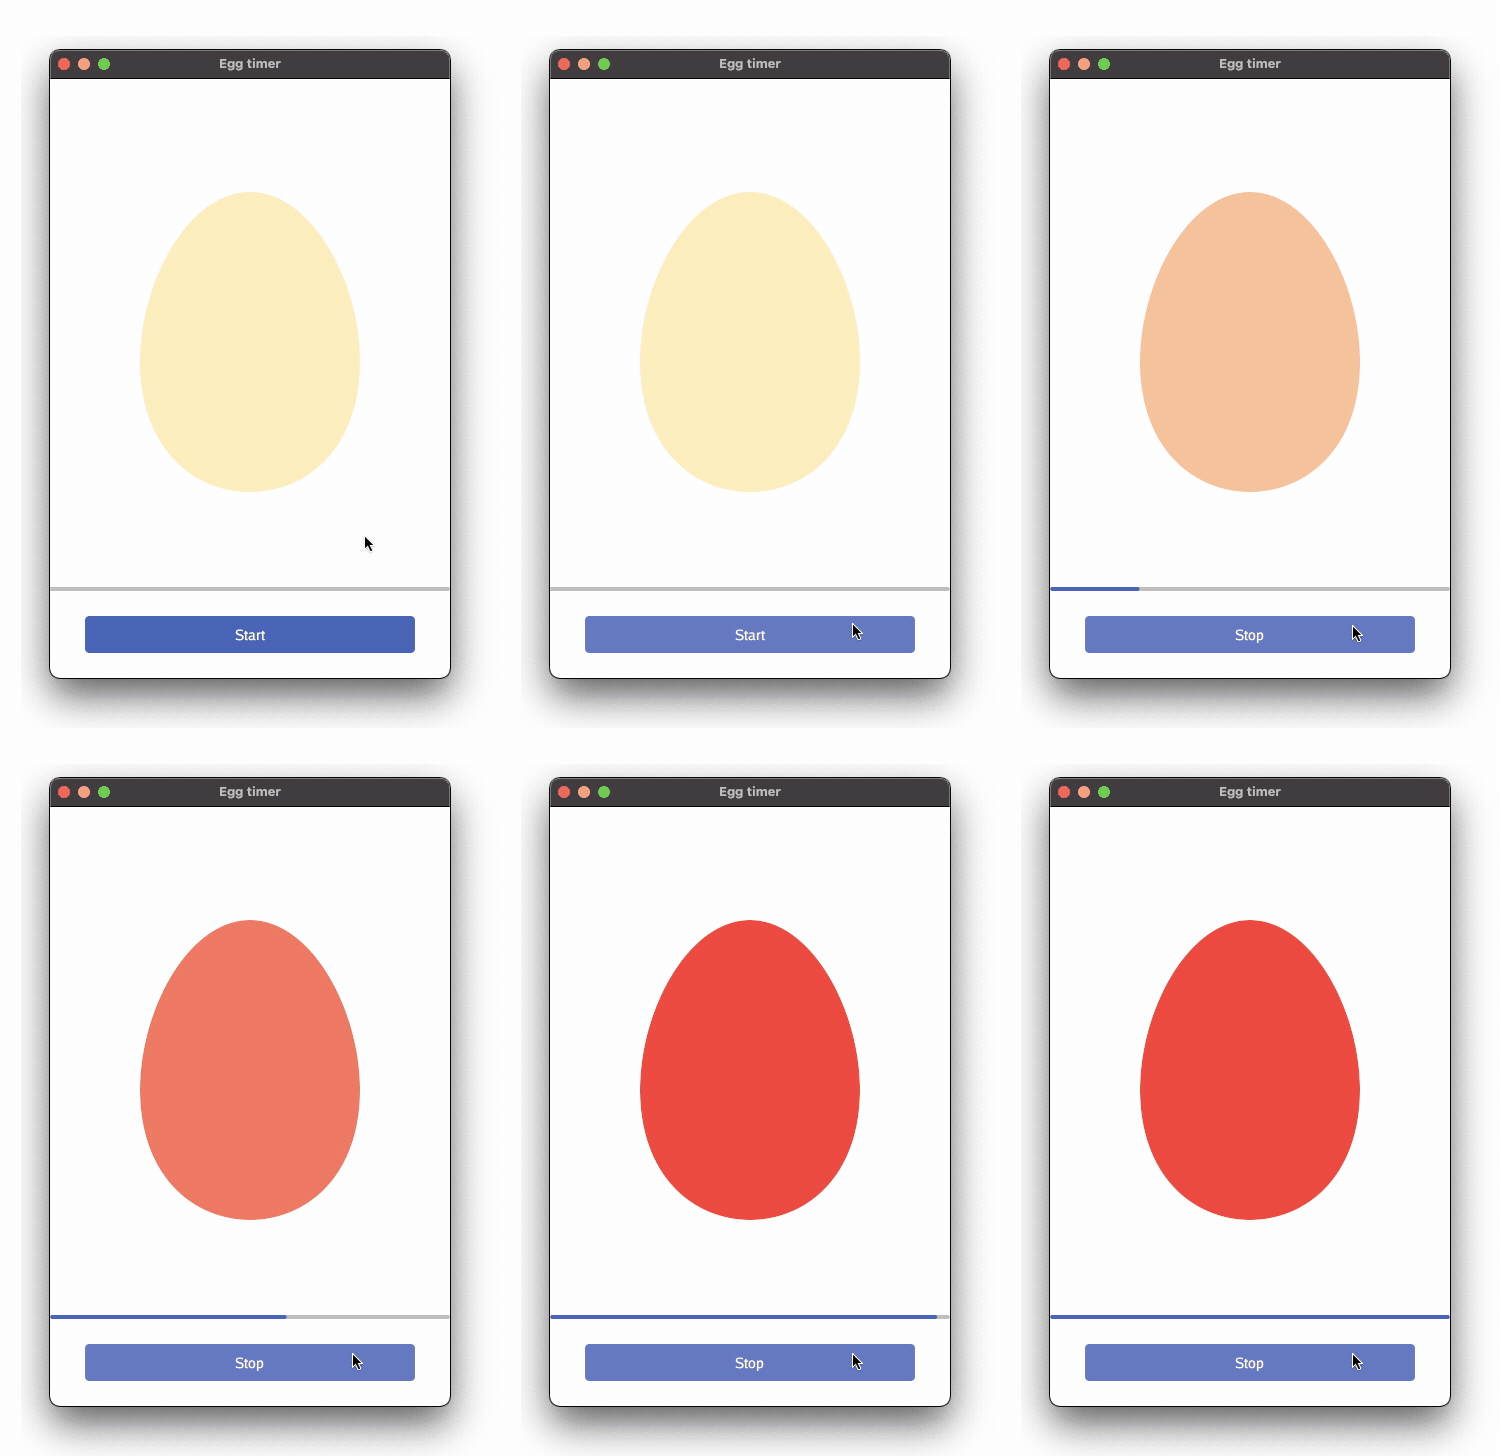
Now we fill the egg with color. Coloring can be static, but wouldn’t it be cool if the egg changed color from cold to warm? I think so too. Remember how progress is a variable from 0 to 1. This state variable can now be used to slowly alter the color as well. * (1 - progress) is just another way of saying gradually turn off Green and Blue please. When progress is complete, both are 0, and we’re left with Red only. Nifty.
We end by returning layout.Dimensions, the height of this widget.